Razor Cutting Techniques: Adding Style and Texture to Men’s Haircuts

The world of men’s grooming is evolving, and an increasingly popular trend is the use of razor cutting techniques to create unique and stylish haircuts. Gone are the days of simple scissor cuts; now, barbers and stylists are embracing the razor as a tool to add texture, volume, and movement to men’s hair. Razor cutting involves using a straight razor or a razor blade to cut and slice into the hair, creating a softer, more natural finish. This technique has been a well-kept secret of stylists for years, often used to create those effortless, just-out-of-bed looks that are so popular today.

One of the key benefits of razor cutting is its ability to add texture and movement to hair. This technique can create a softer, less structured look, perfect for those who want a more relaxed and effortless style. The razor allows barbers to remove weight from the hair, adding volume and creating a fuller appearance. It is particularly effective for men with thick or wavy hair, as it can help to tame and control the hair, giving it a sleek, well-groomed finish.

There are a variety of different razor cutting techniques that barbers can use to create unique styles. One popular method is slicing, where the razor is used to cut on a diagonal, creating soft, textured edges. This technique is perfect for adding movement and flow to the hair. Another approach is using a razor to create defined, sharp lines within the haircut, giving a bold and modern look. Barbers can also use a razor to thin out thick hair, creating a lighter, more manageable style.

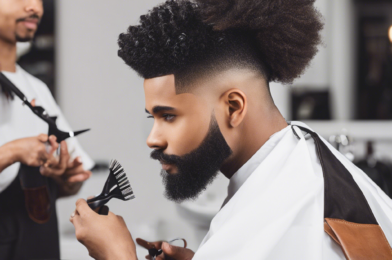
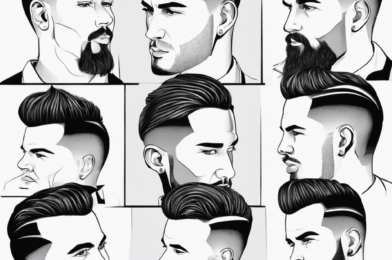
A razor can be used to create an array of men’s hairstyles. One timeless look is the razor-cut pompadour, where the hair is swept up and back, creating a sleek, voluminous style. The razor allows for a softer, more natural finish, making this classic look more relaxed and modern. For those with curly hair, a razor cut can add beautiful definition and shape to the curls, creating a stylish and contemporary look. The undercut, a popular choice for men, can also benefit from razor cutting.

Another advantage of razor cutting is its ability to enhance the natural movement and growth pattern of the hair. By cutting on an angle, barbers can follow the direction of the hair’s growth, creating a seamless and effortless finish. This technique is particularly effective for men who want a style that works with their hair’s natural texture, requiring less styling time and effort. Furthermore, razor cutting can help to blend and soften harsh lines within a haircut.

The versatility of razor cutting means it can be adapted to suit a range of hair types and lengths. Whether you have short, cropped hair or longer, more flowing locks, a razor cut can add an element of edge and style to your look. It is a fantastic way to create a distinctive, signature style that sets you apart from the crowd. However, it is important to note that razor cutting may not suit everyone, and it requires a skilled barber or stylist who can tailor the technique to your specific hair type and desired look.

One of the appeals of razor cutting is the low-maintenance aspect it can offer. Due to the soft and natural finish it creates, hair often appears more relaxed and effortless, requiring less daily styling. This makes it a popular choice for men who want a stylish look without the hassle of extensive grooming routines. A simple run of the fingers through the hair or a quick blast of product can often be enough to achieve that sought-after, laid-back style.

While razor cutting offers many benefits, it is important to note that it should be performed by a trained professional. The use of a straight razor or razor blade requires skill and precision to avoid damaging the hair. An inexperienced hand could potentially cause split ends or an uneven cut. Therefore, it is always advisable to seek out a reputable barber or stylist who has experience in razor cutting techniques to ensure the best results. This will ensure your hair stays healthy and looks fantastic.

Razor cutting is a fantastic way to add an element of individuality and style to men’s haircuts. Whether it’s creating texture, volume, or a soft, natural finish, this technique offers a modern approach to men’s grooming. With the right barber or stylist, any man can achieve a unique and effortless look that suits their personal style and hair type. So, if you’re considering a new haircut, why not give razor cutting a try? You can create a signature look that will set you apart and turn heads.

The world of men’s hair is constantly evolving, and razor cutting is at the forefront of this movement, offering a fresh and modern approach to styling. So, embrace the trend and enjoy the benefits of a stylish, low-maintenance haircut that showcases your unique personality and taste. Ask your barber about razor cutting techniques and how they can transform your look, adding that extra touch of flair and sophistication. It’s time to elevate your grooming game and make a lasting impression.
Perfecting the Classic Taper Cut: Tips from Expert Barbers

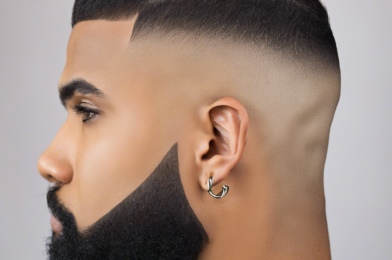
The taper cut is a classic men’s hairstyle that has stood the test of time, offering a sleek, refined look that’s versatile and easy to manage. With its subtle fade from longer hair at the top to shorter sides and back, the taper cut flatters a range of face shapes and hair types. To help you achieve the perfect taper cut, I’ve gathered some expert tips from leading barbers across the country.

“The taper cut is a style that will always be in fashion,” says Anthony Ricci, owner of Razor’s Edge Barber Shop in Boston. “It’s a timeless look that exudes sophistication and class. But it’s important to remember that the taper cut isn’t a one-size-fits-all style. The key to perfecting this look is customization.” Ricci emphasizes that barbers should consider their client’s unique features, such as face shape, hair type, and lifestyle, to create a taper cut that complements their individual characteristics.

Starting with the sides, Ricci recommends using a clipper guard size that suits the client’s desired length. “For a classic taper, I usually start with a guard size of 2 or 3 and gradually work my way down to a lower guard or even a bare blade towards the bottom, creating that smooth, gradual fade. This gives the cut a polished, elegant feel.” He adds that for those with curly or wavy hair, it’s crucial to account for the natural spring of the hair to ensure a harmonious blend.

Meanwhile, Brian Nunez, master barber at The Art of Shaving in New York City, emphasizes the importance of precision when creating a taper cut. “The beauty of this style lies in its clean, crisp lines and a smooth transition from longer to shorter hair. Achieving this requires a steady hand and sharp shears or clippers.” Nunez suggests investing in high-quality tools to ensure accurate and consistent results.

Barbering 101: Understanding Different Hair Types and Textures

The world of barbering is an art, and understanding the diverse landscape of hair types and textures is crucial for any barber worth their salt. From thick and curly locks to fine and straight strands, recognizing and working with different hair types is essential for creating tailored looks and ensuring healthy hair.

Every individual’s hair is unique, and it’s imperative for barbers to recognize this diversity. Hair types are generally categorized into four main groups: straight, wavy, curly, and coily. These categories are further differentiated by the texture and thickness of the hair strands. Straight hair, for instance, can range from fine and thin to coarse and thick, while curly hair varies in terms of curl pattern and volume. Recognizing these differences is key to devising cutting and styling strategies that flatter and enhance an individual’s unique features.

The curl pattern is a fundamental aspect of hair typing. Curl type ranges from loose waves (type 2 hair) to tight corkscrews (type 4 hair). These curl patterns inform the barber of the hair’s natural movement, bounce, and potential for volume. Understanding the curl pattern is crucial for determining the most flattering cuts and the appropriate styling techniques and products to enhance the hair’s natural texture.

Thickness and density also play a significant role in hair typing. Hair thickness refers to the individual strand diameter, while density describes the number of strands on the scalp. Fine hair has a smaller strand diameter, while coarse or thick hair has a larger one. Sparse density indicates fewer strands, while dense or thick density refers to a higher concentration of hair on the scalp.

Barbers must also consider the hair’s porosity, or its ability to absorb and retain moisture. Porosity is influenced by the structure of the hair cuticle, which may be tight and compact or open and raised. Hair with high porosity readily absorbs moisture but struggles to retain it, while low-porosity hair resists moisture absorption due to a tightly bound cuticle layer.

Additionally, recognizing the hair’s elasticity, or its ability to stretch and return to its original shape without breaking, is vital. Highly elastic hair can stretch up to half its length and is generally strong and healthy. In contrast, brittle hair with low elasticity tends to snap back quickly when pulled and is more susceptible to damage and breakage.

Understanding these key characteristics of hair types and textures empowers barbers to create tailored experiences for their clients. By recognizing the unique qualities of each head of hair, barbers can develop cutting, styling, and treatment strategies that cater to the specific needs and attributes of their clients’ hair.

In the world of barbering, embracing diversity and understanding the nuances of different hair types foster excellence in the craft. It empowers barbers to deliver not just flattering hairstyles but also healthy hair that shines from within. This knowledge forms the foundation for barbers to become trusted custodians of their clients’ hair journeys, guiding them toward looks that celebrate their unique traits.

How to Cut Men’s Hair: Essential Scissor and Clipper Techniques

Learning how to cut men’s hair can be a rewarding skill to have, whether you’re looking to save money on trips to the barber or want to experiment with different styles at home. Scissor and clipper techniques are essential to master for anyone interested in cutting hair. In this article, we’ll take a comprehensive look at these techniques and offer step-by-step guidance to help you perfect your at-home haircuts.

Scissor techniques are fundamental to cutting men’s hair. The most basic scissor technique is the blunt cut, which involves cutting hair to the same length all over. This technique is perfect for creating a clean, classic look. To achieve this, simply wet the hair and comb it to remove any tangles. Then, take small sections of hair and cut them to the desired length using sharp scissors. For a more textured look, you can try point cutting, which involves cutting the hair at a slight angle to create movement and dimension. This technique is perfect for layering and adding volume to the hair.

Another essential tool for cutting men’s hair is the clipper. Clippers are versatile and can be used to create a variety of styles, from short fades to longer, more tapered looks. When using clippers, it’s important to select the right guard size for the desired length. Most clippers come with a set of guard attachments that allow you to cut hair to a specific length. For example, a “#1” guard will cut the hair to about 1/8 of an inch.

To create a fade, which is a popular hairstyle that gradually blends from short to long, you’ll need to use a technique called “tapping.” This involves gently tapping the clippers up and down the sides and back of the head, gradually fading the hair from short to long. Fades require practice to perfect, so don’t be discouraged if your first attempts are not perfect.

Whether you’re using scissors or clippers, there are a few general tips to keep in mind. Always cut hair when it is dry to ensure you know the exact length you’re cutting. Start with longer lengths and cut less initially; you can always cut more if needed. Finally, invest in a pair of high-quality haircutting scissors and clippers, as this will make a significant difference in the ease and precision of your cuts.

Once you’ve mastered the basic techniques, you can start experimenting with different styles. Try a pompadour, which is a classic style that features a voluminous top and short sides. Or, go for an undercut, which is a trendy look that involves buzzed or faded sides with longer hair on top. The possibilities are endless, and with practice, you’ll be able to achieve any hairstyle you desire.

Remember to maintain your haircutting tools properly. This includes regularly oiling and cleaning your clippers and scissors to ensure they remain sharp and precise. You should also sanitize your tools before and after each use to prevent the spread of bacteria and germs.

In conclusion, cutting men’s hair can be a fun and rewarding skill to learn. With the right techniques and tools, you can achieve a variety of styles and looks. Start by learning the basics of scissor and clipper use, and don’t be afraid to experiment and try out new styles. With practice, you’ll be well on your way to becoming your own personal barber.

Top 10 Must-Have Barber Tools for Professional Haircutting

The art of barbering has evolved over the centuries, with tools and techniques being refined to give us the modern-day haircuts and styles we know and love. A good barber knows that having the right tools is essential for creating precise and stylish cuts that leave a lasting impression. So, whether you’re an established barber looking to upgrade your kit or a novice wanting to get a handle on the basics, here’s a list of the top 10 must-have tools for professional haircutting.

First and foremost, a good set of clippers is an essential investment for any barber. Look for a durable, lightweight pair with a powerful motor and sharp blades that can handle a variety of hair types and lengths. Attachments and guards of varying sizes will also give you more flexibility and control over your cuts. Scissors, or shears, are another fundamental tool. A standard set of barber shears should include a cutting shear for trimming hair and a thinner for texture and finishing work. Invest in a high-quality pair that feels comfortable in your hand and is made from durable steel.

Combs are another essential, allowing barbers to section, lift, and guide hair during cutting. A good set of combs should include a variety of sizes and widths to handle different hair lengths and styles. Go for durable, static-resistant materials that are comfortable to hold. For longer haircuts or to add texture and shape to styles, a good set of barber cutting razors is a must-have. Choose a durable, easy-to-maneuver straight razor, as well as a thinner with a wavy blade for texturizing.

Mirrors are an essential part of any barber’s setup, allowing you to show off your handiwork and giving clients a chance to admire their new look. A free-standing or wall-mounted mirror is ideal, with options that can be tilted or moved to give barbers the best angle. You don’t want foggy mirrors, so look for ones with anti-fog technology.

No barber station is complete without a good selection of styling products. Pomades, waxes, gels, and creams can help you create and define a wide range of styles, from sleek and retro looks to modern, texturized cuts. It’s also worth investing in a quality hairdryer. A good dryer should be lightweight, powerful, and have a range of heat and speed settings to suit different hair types.

Sectioning clips and clamps are essential for any barber, allowing you to separate and secure hair during cutting or styling. Look for durable, easy-to-use options that won’t slip or damage the hair. Lastly, a good barber cape is essential for keeping clients comfortable and protected during their haircut or shave. Look for durable, washable materials that are comfortable and breathable.

There you have it—the top 10 tools that every barber needs to create magic! With these tools at your disposal, you’ll be well on your way to crafting stylish haircuts and memorable looks for your clients.

The Art of Freehand Scissor Cutting: Unleash Your Creativity

The art of freehand scissor cutting is a unique and creative skill that allows individuals to craft intricate designs and shapes solely using a pair of scissors and their imagination. This ancient practice, often associated with folk art and paper cutting traditions, has experienced a modern resurgence, captivating artists, designers, and craft enthusiasts alike. Freehand scissor cutting empowers individuals to transcend the limitations of two-dimensional art, inviting them to explore the captivating world of three-dimensional creations.

Freehand scissor cutting, an art form that requires precision, patience, and a steady hand, involves using scissors to delicately cut intricate designs into paper, fabric, or other thin materials. The technique allows artists to create breathtaking sculptures, greeting cards, decorations, and even fashion accessories, pushing the boundaries of what can be achieved with a simple pair of scissors. This innovative art form demands a keen eye, a steady hand, and the ability to envision complex designs translated into delicate cuttings.

The beauty of freehand scissor cutting lies in its accessibility and the endless creative possibilities it offers. With just a pair of scissors and readily available materials such as paper or fabric, anyone can embark on this artistic journey. This art form empowers individuals to explore their creativity, develop their fine motor skills, and discover the joy of transforming plain sheets into exquisite works of art. It encourages individuals to embrace their unique artistic vision and create intricate patterns, silhouettes, and three-dimensional forms.

Freehand scissor cutting has gained popularity among artists seeking to challenge themselves and explore a new medium. The precision and skill required to master this art form attract those who enjoy intricate details and the satisfaction of bringing complex designs to life. It invites experimentation with different materials, cutting techniques, and innovative approaches, fostering a sense of community among artists who embrace this timeless tradition.

The versatility of freehand scissor cutting knows no bounds, with applications spanning across various industries. From crafting bespoke wedding invitations and personalized gifts to creating intricate costumes and fashion accessories, the demand for this skill is ever-growing. Artists can find endless opportunities to showcase their talent, whether in the realm of stationery, home décor, fashion, or even prop design for movies and theater.

For beginners eager to explore freehand scissor cutting, the journey begins with mastering the basics. Starting with simple shapes and designs helps build confidence and develop a feel for the scissors. Gradually, practitioners can advance to more complex patterns, incorporating negative space and intricate details. Online tutorials and communities provide a wealth of resources, fostering a supportive environment for newcomers to seek guidance and share their creations.

The art of freehand scissor cutting is a testament to human creativity and our innate desire to craft beauty from the simplest of tools. It serves as a reminder that art knows no bounds and that with dedication and patience, anyone can unlock their creative potential. Whether practiced as a hobby or pursued professionally, freehand scissor cutting continues to captivate imaginations and inspire incredible artistic endeavors.

So, pick up a pair of scissors and embark on a creative adventure, where each cut brings your unique vision to life. Unleash your creativity, refine your skills, and discover the endless possibilities that await in the captivating world of freehand scissor cutting. Embrace the joy of creation and the sense of fulfillment that comes with transforming ordinary materials into extraordinary works of art.

Mastering the Fade Haircut: A Step-by-Step Guide for Beginners

The fade haircut is a popular style that has been a staple in barbershops for decades, and for good reason. It’s sleek, modern, and can be tailored to suit any face shape and personality. Mastering the fade may seem daunting for beginners, but with the right techniques and practice, anyone can become a pro.

To start, you’ll need the right tools. Invest in a good pair of clippers with a range of guard sizes, as well as a trimmer for detailing. Before you begin fading, make sure your client’s hair is washed, clean, and towel-dried. Start by choosing the right guard size for the sides and back. For a classic fade, you’ll want to use a shorter length, usually a #1, #2, or #3, and gradually blend it into a longer length on top.

Section the hair into three parts: the sides, back, and top. Begin clipping the sides, moving your clippers in an upward motion from the sideburns to the natural hairline at the back of the head. Use a lighter touch as you blend, to create a smooth transition. Repeat this process on the other side, ensuring that the length and blend are consistent all around.

Now, focus on the back. Start from the bottom and work your way up, blending the hair at the nape of the neck. Create a smooth, curved line as you blend upwards, following the natural shape of the head. Once you’re happy with the sides and back, it’s time to move on to the top.

Choose a guard length that is suitable for the desired look and begin cutting the hair on top, moving the clippers in the opposite direction to the natural growth. This will help to create volume and texture. Use your trimmer to clean up the hairline and neckline, and to add any additional details or shaping.

Finally, use a hand mirror to show your client the back of their head, and don’t be afraid to fix any imperfections. Finish off the look with some styling product if desired, and your fresh fade haircut is complete!

Remember, practice makes perfect, so don’t be discouraged if your first few attempts don’t turn out exactly as planned. With time and patience, you’ll be able to master the fade haircut and offer your clients a wide range of stylish looks.

Now, let’s break down the steps in more detail, offering a comprehensive guide for beginners looking to master the fade. From choosing the right tools and preparing the hair, to blending, detailing, and finishing, we’ll cover everything you need to know to confidently offer this popular haircut to your clients.

First, let’s talk about clipper technique. When creating a fade, it’s important to use a gentle, feathering motion to blend the lengths seamlessly. Start by holding the clippers straight and close to the head, then slowly tilt them outwards as you move upwards. This will create a soft gradient effect. Practice this movement until it feels natural, as it’s crucial to achieving a smooth fade.

Another key factor is choosing the right guard sizes. For a classic fade, you’ll typically use a shorter length on the sides, such as a #2 or #3, and gradually increase the guard size as you move up the head, creating a seamless blend. Experiment with different guard combinations to create unique looks suited to your client’s preferences.

Detailing is also an important aspect of the fade haircut. Use your trimmer to clean up the hairline, creating a sharp edge or a natural, soft finish depending on the style your client prefers. You can also use the trimmer to add partings or create intricate designs, taking your fade to the next level.

Finally, don’t forget the finishing touches. Styling products can be used to add texture, shine, or hold, allowing you to create a variety of looks, from sleek and polished to messy and relaxed.

Now that we’ve covered the basics and offered some advanced tips, you’re well on your way to mastering the fade haircut. Remember to practice, be patient, and always listen to your client’s preferences to create a fade that suits their unique style. Happy cutting!